init(content: () -> Content)Overview 概要
Use a settings scene to have SwiftUI manage views with controls for your app’s settings when you declare your app using the App protocol. When you use an App declaration for multiple platforms, compile the settings scene only in macOS:
@main
struct MyApp: App {
    var body: some Scene {
        WindowGroup {
            ContentView()
        }
        #if os(macOS)
        Settings {
            SettingsView()
        }
        #endif
    }
}
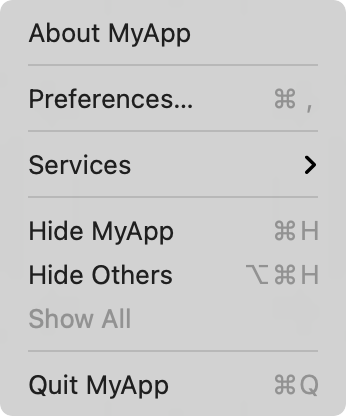
Passing a view as the argument to a settings scene in the App declaration causes SwiftUI to enable the app’s Preferences menu item. SwiftUI manages displaying and removing the settings view when the user selects the Preferences item from the application menu or the equivalent keyboard shortcut:

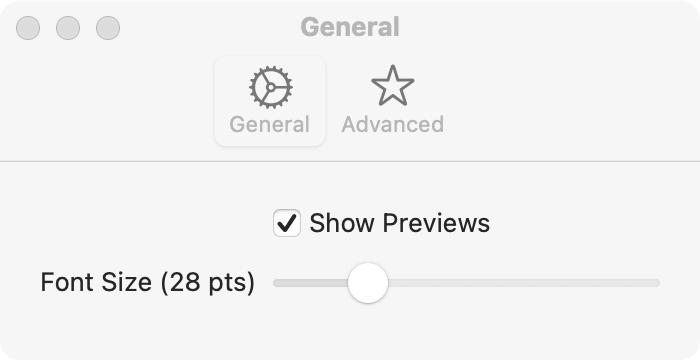
The contents of your settings view are controls that modify bindings to User values that SwiftUI manages using the App property wrapper:
struct GeneralSettingsView: View {
("showPreview") private var showPreview = true
("fontSize") private var fontSize = 12.0
var body: some View {
Form {
Toggle("Show Previews", isOn: $showPreview)
Slider(value: $fontSize, in: 9...96) {
Text("Font Size (\(fontSize, specifier: "%.0f") pts)")
}
}
.padding(20)
.frame(width: 350, height: 100)
}
}You can define your settings in a single view, or you can use a Tab to group settings into different collections:
struct SettingsView: View {
    private enum Tabs: Hashable {
        case general, advanced
    }
    var body: some View {
        TabView {
            GeneralSettingsView()
                .tabItem {
                    Label("General", systemImage: "gear")
                }
                .tag(Tabs.general)
            AdvancedSettingsView()
                .tabItem {
                    Label("Advanced", systemImage: "star")
                }
                .tag(Tabs.advanced)
        }
        .padding(20)
        .frame(width: 375, height: 150)
    }
}